How to Configure SPF for SpamExperts

Quick Answer
An SPF record for SpamExperts is configured by adding the correct SPF TXT record to your domain’s DNS settings. This record authorizes SpamExperts mail servers to send emails on behalf of your domain, helping improve email deliverability and protect against spoofing and phishing attacks.

Sender Policy Framework (SPF) is an email authentication method that helps protect your domain against spoofing and unauthorized email usage. By publishing an SPF record in your DNS, you specify which mail servers are permitted to send emails on behalf of your domain.
This guide explains how to configure SPF records for SpamExperts environments, including Hosted Cloud, Local Cloud, and branded SPF configurations.
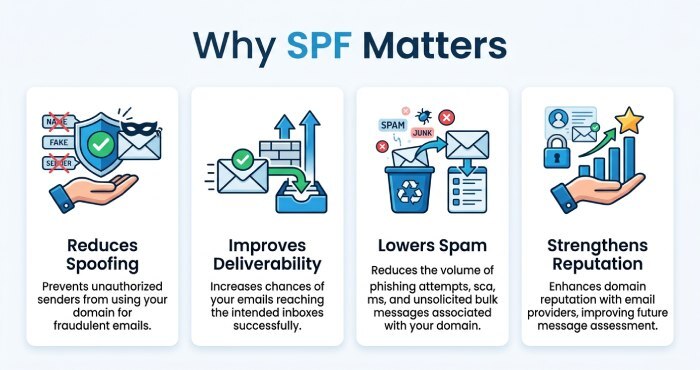
Why SPF Matters
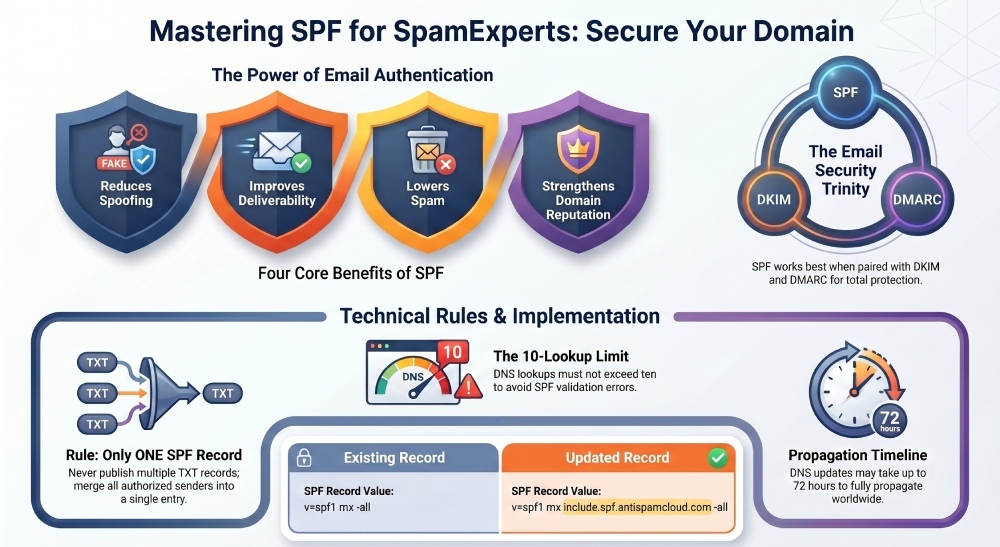
SPF improves email security by allowing receiving mail servers to verify whether incoming messages are being sent from approved sources. Proper SPF implementation can help:
- Reduce email spoofing attempts
- Improve email deliverability
- Lower the chances of messages landing in spam folders
- Strengthen domain reputation
SPF Configuration for SpamExperts Hosted Cloud
If you are using SpamExperts Hosted Cloud services, follow these steps to add SPF support to your domain.
Step 1: Access Your DNS Settings
Log in to the platform where your DNS records are managed. This may be your hosting provider, registrar, or DNS management service.
Step 2: Locate Your SPF Record
Search for an existing TXT record that begins with:
v\=spf1
If no SPF record currently exists, you will need to create a new TXT record.
Step 3: Add the SpamExperts Include Mechanism
Use the following SPF value:
v=spf1 include:spf.antispamcloud.com -all
This authorizes SpamExperts mail servers to send email on behalf of your domain.
Example for Domains with Existing SPF Records
If you already use SPF for other mail services, simply add the SpamExperts include statement to your current record.
Existing Record
v\=spf1 mx -all
Updated Record
v\=spf1 mx include:spf.antispamcloud.com -all
Step 4: Save Your DNS Changes
After updating the record, save the configuration in your DNS manager.
Step 5: Allow DNS Propagation
DNS updates may require several hours to fully propagate worldwide. In some cases, propagation can take up to 72 hours.
SPF Setup for SpamExperts Local Cloud
Local Cloud deployments require SPF records that reference the public IP addresses used by your outbound mail servers.
Create a Dedicated SPF Hostname
You can create a subdomain such as:
spf.yourdomain.com
Then add a TXT record similar to:
v\=spf1 ip4:1.2.3.4/32 -all
Replace the IP address with the actual outbound sending IP used by your server cluster.
Reference the SPF Host in Your Main Domain
Your primary SPF record should then include that hostname:
v\=spf1 include:spf.yourdomain.com -all
This approach simplifies management if server IPs change later.
Recommended DNS Structure
For environments with multiple outbound servers, you can assign several A records to the SPF hostname:
spf.yourdomain.com → Primary IP of Server 1 spf.yourdomain.com → Secondary IP of Server 1 spf.yourdomain.com → Primary IP of Server 2 spf.yourdomain.com → Secondary IP of Server 2
This setup reduces the need to modify customer SPF records whenever infrastructure changes occur.
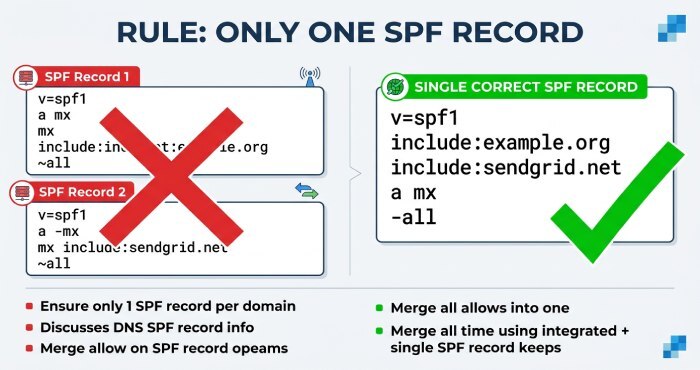
Adding SpamExperts to Existing SPF Records
If your domain already uses SPF for other email providers, do not create multiple SPF TXT records. Instead, update the existing record by adding the SpamExperts authorization mechanism.
Example
v\=spf1 include:mailprovider.com a:spf.yourdomain.com -all
Having more than one SPF record can cause validation failures and email delivery problems.
Creating a Branded SPF Record
Some organizations prefer using their own branded SPF hostname rather than referencing the default SpamExperts domain directly.
Step 1: Create a Subdomain
Example:
spf.yourdomain.com
Step 2: Add a TXT Record
Use the following value:
v\=spf1 include:spf.antispamcloud.com -all
Step 3: Ask Clients to Include Your SPF Host
Clients can then publish the following SPF record:
v\=spf1 include:spf.yourdomain.com -all
This provides a more customized and branded SPF implementation.
Best Practices for SPF Configuration
To maintain a healthy SPF setup, consider the following recommendations:
Use Only One SPF Record
Domains should never publish multiple SPF TXT records. Merge all authorized senders into a single SPF entry.
Keep SPF Records Updated
Whenever you add new email services or outbound servers, update your SPF record accordingly.
Monitor DNS Lookup Limits
SPF has a limit of 10 DNS lookups. Excessive includes or nested records may cause SPF validation errors.
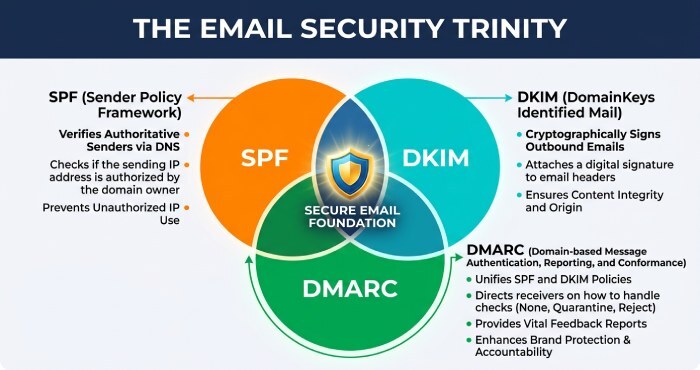
Pair SPF with DKIM and DMARC
SPF works best when combined with:
- DKIM for message integrity
- DMARC for enforcement and reporting
Using all three authentication methods significantly improves domain protection and email trustworthiness.
Verifying Your SPF Record
After publishing your SPF configuration, verify that the record is working correctly using an SPF lookup or DNS checking tool. Validation helps identify:
- Syntax errors
- Missing include statements
- Multiple SPF records
- Lookup limit problems
Topics
General Manager
Founder and General Manager of DuoCircle. Product strategy and commercial lead for AutoSPF's 2,000+ customer base.
LinkedIn Profile →