Exchange Server DKIM Setup: How to Configure DKIM on On-Prem Exchange

Quick Answer
Configure DKIM by installing a DKIM signing tool or SMTP gateway, generating DKIM keys, publishing the public key in DNS, enabling email signing, and validating DKIM, SPF, and DMARC alignment to improve email security and deliverability.
Configuring DKIM for Exchange Server is essential for protecting outbound mail, improving email deliverability, and helping receiving servers verify that messages were not altered in transit. While Microsoft 365 includes native DKIM controls, on-prem Exchange and on-premises Exchange environments require a separate DKIM setup approach, typically using a third-party signing tool, transport agent, SMTP gateway, or hosted DKIM service.
What DKIM Is and Why It Matters for On-Prem Exchange Server
Domain Keys Identified Mail in an Exchange Server context
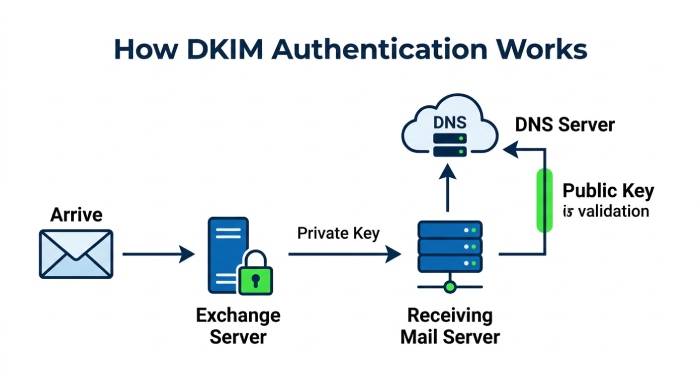
DKIM stands for Domain Keys Identified Mail. It is an email authentication method that uses public-key cryptography to add a DKIM signature to outbound email. When Exchange Server sends a message, the signing service adds a cryptographic header using a private key. The receiving mail server then retrieves the matching public key from DNS and validates the DKIM signature.
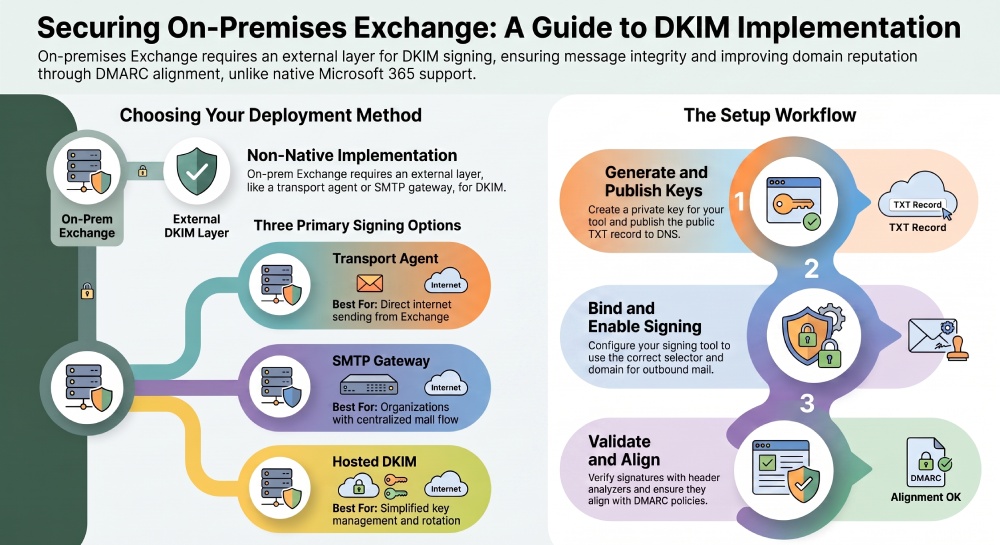
In an on-prem Exchange environment, DKIM authentication is not enabled natively in the same way it is for Microsoft 365. That means administrators must add Exchange Server DKIM signing through another layer, such as:
- A DKIM transport agent installed on Exchange Server
- An SMTP relay or secure email gateway
- A hosted DKIM provider
- A cloud-based email authentication platform with DKIM signing capabilities
For on-premises Exchange, DKIM matters because it proves that your domain authorized the message. Domain Keys Identified Mail also supports DMARC alignment, which is critical when implementing stricter DMARC policies such as p=quarantine or p=reject.
Why DKIM authentication improves deliverability and trust
DKIM authentication helps mailbox providers such as Gmail, Outlook, Yahoo, and enterprise spam filters distinguish legitimate outbound email from spoofed or modified messages. A proper DKIM setup can improve email deliverability, reduce spam placement, and strengthen domain reputation.
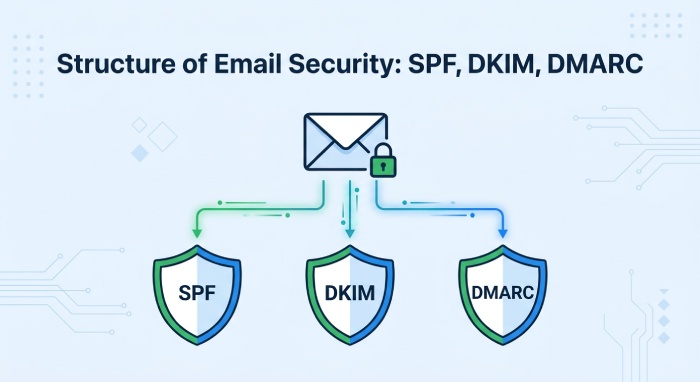
However, DKIM is only one part of email authentication. It should work alongside SPF and DMARC. SPF verifies the sending infrastructure, DKIM verifies message integrity and domain authorization, and DMARC tells receivers how to handle mail that fails authentication or alignment.
While AutoSPF does not sign outbound email with DKIM, it helps administrators maintain accurate SPF records across Exchange Server, Microsoft 365, SMTP gateways, and third-party email services. Proper SPF management complements DKIM and DMARC, reducing authentication failures and improving deliverability.
For stronger email security, on-prem Exchange administrators should monitor SPF, DKIM, DMARC, MTA-STS, BIMI, and TLS-RPT together. Regularly validating authentication records and maintaining accurate SPF configurations helps ensure consistent email delivery and domain protection as mail infrastructure evolves.
Prerequisites: Domains, DNS Access, Exchange Version, and DKIM Signing Tool Options
Domain and DNS ownership requirements
Before starting the DKIM setup, confirm that you control the sending domain and can publish TXT records in public DNS. Each domain that sends mail from Exchange Server should have its own DKIM selector and public key. For example, if your organization sends from example.com, you may publish a record such as:
selector1._domainkey.example.comThe value of this DNS TXT record contains the public key used for Domain Keys Identified Mail validation.
You should also verify your existing SPF configuration. Before signing, confirm your SPF record includes all authorized outbound email sources, such as your Exchange Server public IPs, SMTP relay, marketing platform, CRM, helpdesk system, or transactional mail service. If any of these SPF terms are unfamiliar, our SPF glossary defines them.
Signing architecture and tool selection
On-prem Exchange does not include built-in DKIM signing controls, so you need to choose a signing method. Common options include:
-
Exchange DKIM transport agent Installed directly on Exchange Server, this agent signs outbound email as it passes through the transport pipeline.
-
SMTP relay or secure email gateway Exchange routes outbound email to an SMTP service that applies DKIM authentication before delivery.
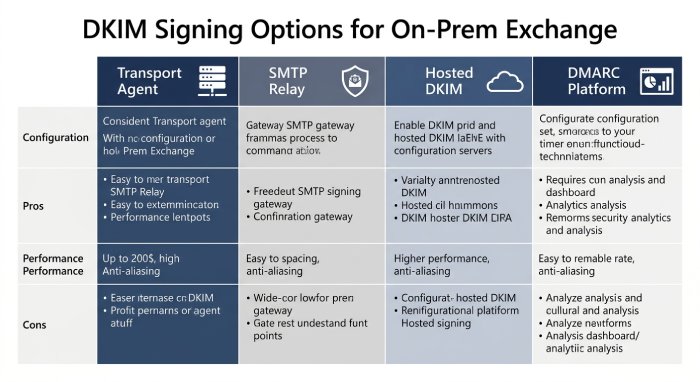
-
Hosted DKIM service Hosted DKIM signs mail externally, reducing operational overhead for on-premises Exchange teams.
-
DMARC platform integration Many email authentication platforms provide Hosted DKIM, Hosted SPF, reporting, analytics, and centralized visibility to simplify email authentication management across multiple domains and sending services.
For organizations running hybrid infrastructure, Hosted DKIM is often easier to maintain than local key rotation. Hosted DKIM also helps when multiple sending systems must share consistent DKIM authentication and DMARC alignment policies.
Example routing decisions for on-premises Exchange
If your Exchange Server sends directly to the internet, a transport agent can work well. If all outbound email already flows through an SMTP gateway, it is usually better to sign at the gateway. If you want simplified key management, reporting, and integrations, a hosted DKIM service or email authentication platform may be the best option.
Step-by-Step DKIM Configuration for Exchange Server
A typical Exchange Server DKIM setup follows this process:
-
Inventory all sending domains Identify every domain used in outbound email. Include primary domains, subdomains, aliases, application mail, newsletters, and support mailboxes.
-
Choose a DKIM selector Use a selector such as
selector1,mail, ordkim2025. Selectors allow key rotation without disrupting existing DKIM authentication.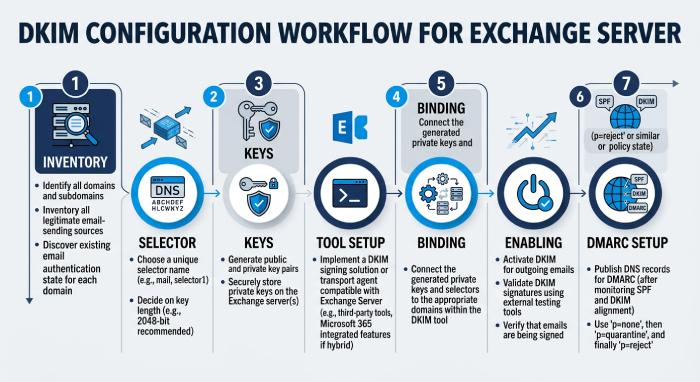
-
Generate the DKIM key pair Use a trusted DKIM generator or your signing tool to create a private key and public DNS value. For quick key creation, a DKIM generator can help produce the required TXT value.
-
Install or configure the signing tool If using a transport agent, install it on the appropriate Exchange Server mailbox or transport role. If using SMTP routing, configure Exchange send connectors to route outbound email through the signing gateway.
-
Bind the domain and selector Configure the signing tool so that
example.comusesselector1and signs mail with the correct private key. -
Enable DKIM signing for outbound email Send a test message and confirm that a DKIM signature header appears. The header should reference your domain and selector.
-
Align DKIM with DMARC DMARC alignment requires the DKIM signing domain to match, or be organizationally related to, the visible From domain. This is especially important for on-prem Exchange environments using relays or third-party senders.
This step-by-step DKIM setup gives on-premises Exchange administrators a repeatable path to deploy Domain Keys Identified Mail without disrupting production mail flow.
Publishing and Validating DKIM DNS Records
After generating the public key, publish it as a TXT record in DNS. A typical DKIM DNS value looks like this:
v=DKIM1; k=rsa; p=PUBLICKEYVALUE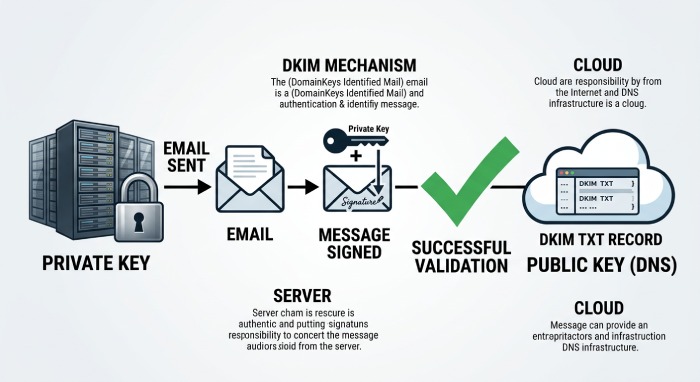 The private key stays with your signing system and must never be published. The public key goes into DNS so receiving servers can validate the DKIM signature.
Once the DNS record is published, validate it with tools such as:
- DKIM Checker
- DKIM Generator
- DMARC Checker
- DMARC Generator
- DMARC Analyzer
- Domain Analyzer
- SPF Checker
- SPF Generator
- BIMI Checker
- BIMI Generator
- MTA-STS Checker
- TLS-RPT Checker
- DANE Record Checker
After publishing your DKIM record, use DNS lookup and email authentication validation tools to verify that the public key is accessible and the DKIM signature is working correctly. Regularly checking DKIM, SPF, and DMARC records helps identify configuration issues early and ensures your email authentication remains aligned as your infrastructure evolves.
If your DNS provider has TXT length restrictions, split long public keys correctly. Many 2048-bit DKIM keys require quoted string splitting, but the final DNS response must still resolve as one continuous value.
Testing, Troubleshooting, and Maintaining DKIM Alignment with SPF and DMARC
Testing DKIM, SPF, and DMARC together
After publishing records, send test messages to external mailboxes and inspect the headers. You can use an email header analyzer to verify:
- DKIM authentication passed
- SPF authentication passed
- DMARC passed
- The DKIM signing domain aligns with the From domain
- The SPF return-path domain aligns where applicable
- The DKIM signature was not broken by mail flow rules, disclaimers, or gateways
A successful result might show:
dkim=pass
spf=pass
dmarc=pass
If DKIM fails, check the selector, DNS record, canonicalization settings, private key mapping, and whether any downstream system modifies the message body after signing.
Troubleshooting and ongoing maintenance
Common causes of DKIM setup failure in on-prem Exchange include incorrect DNS TXT formatting, signing the wrong domain, missing send connector routing, expired keys, and content modification after signing. Transport rules that add disclaimers can invalidate the DKIM signature if they run after signing.
To maintain strong email deliverability, rotate DKIM keys periodically, review DMARC aggregate reports, and monitor authentication trends. Regularly validate your DKIM signatures, keep DNS records up to date, and ensure any changes to your mail flow or sending infrastructure do not break DKIM alignment.
Managing SPF becomes increasingly difficult when Exchange Server works alongside Microsoft 365, CRM platforms, marketing tools, and SMTP relays. AutoSPF simplifies SPF record management by helping you consolidate authorized senders, avoid DNS lookup limits, and maintain accurate SPF records while DKIM and DMARC protect message integrity and domain alignment. It also handles edge cases like SPF macros that can complicate manually maintained records.
For broader email security, use SPF, DKIM, and DMARC together, and consider implementing MTA-STS, BIMI, and TLS-RPT where appropriate. Regular security monitoring and authentication validation help protect your domain and improve email deliverability.
Organizations should regularly monitor their email authentication records, review DMARC reports, and verify that SPF and DKIM remain aligned as mail systems evolve. Routine audits of DNS records, sending sources, and authentication results help maintain strong deliverability, protect domain reputation, and reduce the risk of email spoofing.
For on-prem Exchange and on-premises Exchange administrators, the goal is not only to deploy Domain Keys Identified Mail once, but to keep DKIM authentication aligned with SPF and DMARC as infrastructure changes. A well-maintained Exchange Server DKIM implementation improves email deliverability, protects brand identity, and gives receiving systems stronger evidence that your outbound email is legitimate.
General Manager
Founder and General Manager of DuoCircle. Product strategy and commercial lead for AutoSPF's 2,000+ customer base.
LinkedIn Profile →