Beehiiv SPF & DKIM Setup for Newsletter Email Authentication

Quick Answer
Beehiiv SPF and DKIM setup involves adding the platform-provided CNAME records to your domain’s DNS settings. Proper SPF, DKIM, and DMARC configuration helps authenticate newsletter emails, protect your domain from spoofing, and improve email deliverability.
Why SPF and DKIM Matter for Beehiiv Newsletter Deliverability
Beehiiv newsletters require proper email authentication to build sender trust and improve deliverability. A well-configured SPF record, reliable DKIM signature, and properly monitored DMARC policy help ensure your emails reach subscribers’ inboxes instead of being marked as spam or blocked.
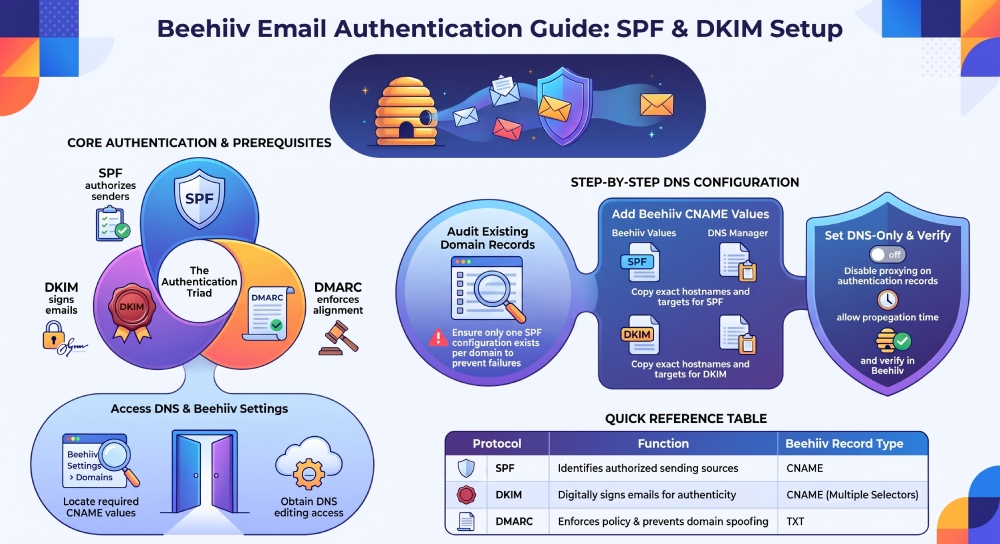
SPF (Sender Policy Framework) identifies authorized email-sending sources for your domain. DKIM (DomainKeys Identified Mail) adds a digital signature to verify message authenticity, while DMARC (Domain-based Message Authentication, Reporting, and Conformance) connects both authentication methods to help prevent email spoofing and phishing.
How SPF, DKIM, and DMARC Work Together
SPF verifies authorized senders, DKIM validates newsletter signatures, and DMARC checks their alignment with your visible “From” domain. Start with a DMARC monitoring policy, then gradually move to quarantine or reject as authentication becomes stable, using relaxed or strict alignment as needed.
Prerequisites: Domain Access, DNS Settings, and Beehiiv Sending Domain Setup
Before using Beehiiv, ensure you own the domain and have access to its DNS settings to add or edit TXT and CNAME records. Then, navigate to Settings > Emails in Beehiiv to find the required SPF, DKIM, and tracking records, or contact Beehiiv Support for assistance.
You should also decide which domain structure to use:
- Root domain:
yourdomain.com - Subdomain:
news.yourdomain.com - Sending address:
newsletter@yourdomain.com - Reply-to address:
hello@yourdomain.com
Your email signature, sender address, and reply-to address should all reinforce the same brand identity. This consistency helps recipients recognize your publication and supports domain reputation over time.
Tools to Have Ready
Use DNS lookup tools and Terminal commands such as dig or nslookup to verify record values, check propagation, and confirm that SPF, DKIM, and DMARC authentication are configured correctly.
For stronger email security, document every DNS change you make and keep screenshots of Beehiiv’s required values before editing records.
Step-by-Step Guide to Adding Beehiiv SPF Records
1. Check for an Existing SPF Record
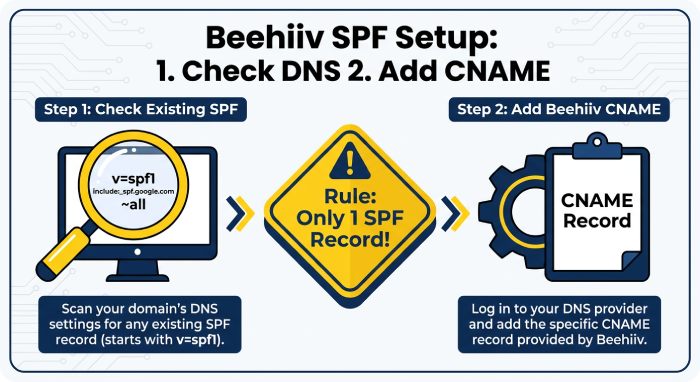
Log in to your DNS provider, such as GoDaddy, Namecheap, or Cloudflare, and inspect the TXT record entries for your root domain or sending subdomain. An SPF record starts with:
v=spf1You should only have one SPF record per domain. Multiple SPF TXT record entries can cause SPF failure, which harms email deliverability and domain reputation.
If your domain already uses SPF for Google Workspace, Microsoft 365, Postmark, or other email-sending services, review your existing SPF configuration before making changes. Beehiiv provides a separate SPF CNAME record during custom email domain setup. Add the hostname and target exactly as displayed in your Beehiiv dashboard. Do not create an additional SPF TXT record or replace existing authentication records without checking their purpose.
2. Add or Update the TXT Record
During Beehiiv’s custom email domain setup, the platform provides an SPF CNAME record alongside its DKIM records. Navigate to Settings > Domains, open your custom-domain setup, and select the manual DNS configuration option if you are adding records yourself.
Copy the exact SPF CNAME hostname and target generated by Beehiiv into your DNS provider. Do not replace it with a guessed TXT record or an assumed SPF include value.
If your domain already uses SPF for Google Workspace, Microsoft 365, or other sending services, review the existing authentication configuration before making DNS changes.
Step-by-Step Guide to Adding Beehiiv DKIM Records
1. Find the Beehiiv DKIM Record Values
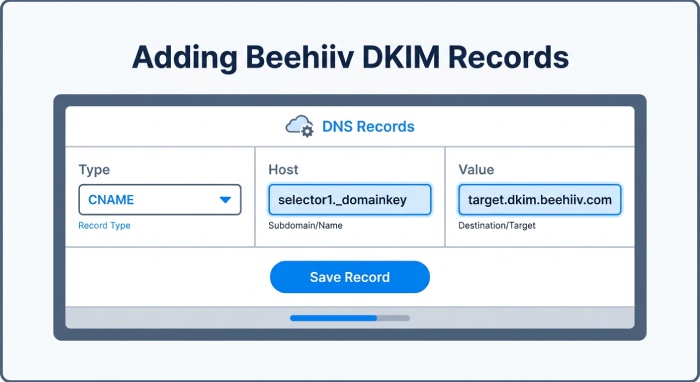
Log in to Beehiiv, open Settings, and select Domains. Start or access your custom-domain setup and locate the email sending domain records. Choose manual DNS configuration to view the individual record types, hostnames, and targets.
A DKIM setup might include:
- Type: CNAME
- Host/name: something like
selector1._domainkey - Value/target: a Beehiiv-provided domain
- Additional CNAME records for other selectors
Copy each value exactly. Even a missing period, extra space, or incorrect host prefix can prevent DKIM alignment and damage email deliverability.
2. Add the CNAME Records in DNS
In your DNS settings, create the required CNAME records. If your DNS provider automatically appends the domain name, enter only the host portion. For example, if Beehiiv says:
selector1._domainkey.yourdomain.comyour provider may only require:
selector1._domainkeyEnsure DKIM CNAME records are set to DNS-only and point to the exact targets provided by Beehiiv. After saving, allow time for DNS propagation and verify the records in Beehiiv. Proper DKIM configuration helps maintain email authentication and DMARC alignment, especially when forwarded emails cause SPF alignment to fail.
General Manager
General Manager of DuoCircle. Product strategy and commercial lead for AutoSPF's 2,000+ customer base.
LinkedIn Profile →